Unlock your hip flexibility with the powerful Pigeon Pose (Eka Pada Rajakapotasana). This comprehensive guide provides a step-by-step approach, from foundational stretches to advanced modifications, ensuring a safe and effective practice for all levels. Learn to maximize the benefits of this transformative pose and experience the profound impact on your overall well-being.
Delve into the intricacies of Pigeon Pose, exploring its benefits, proper alignment, and variations. Discover how to prepare your body, perform the pose safely, and adapt it to your unique needs. Furthermore, understand the precautions and contraindications for a secure practice.
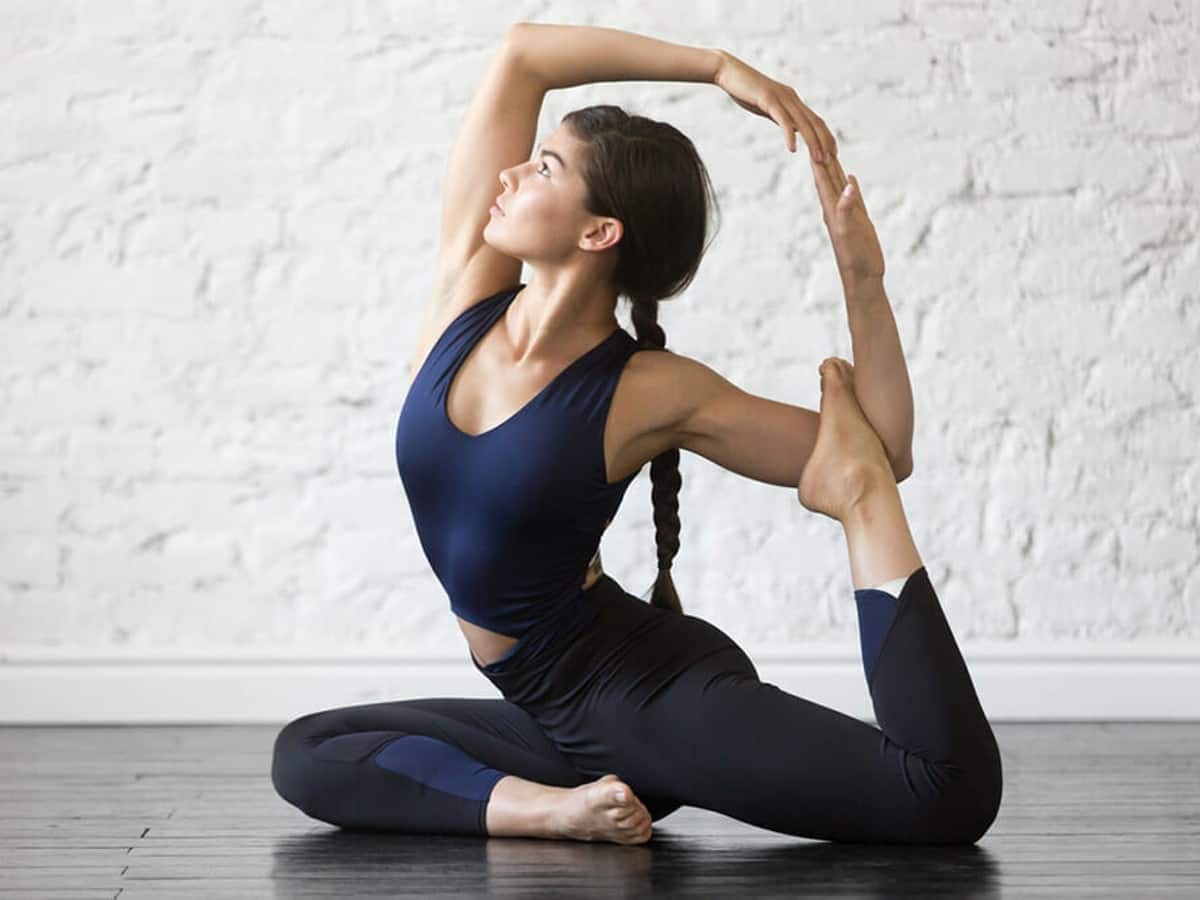
Introduction to Pigeon Pose (Eka Pada Rajakapotasana)
: - ZBrushCentral")
Pigeon Pose, also known as Eka Pada Rajakapotasana, is a foundational hip-opening asana in yoga. It gently stretches the hips, thighs, and groin muscles, while also lengthening the spine and opening the chest. This pose is particularly beneficial for those who spend significant time sitting, experiencing tightness in the hips, or seeking improved flexibility.This pose offers a variety of benefits beyond simply increasing flexibility.
It can help alleviate lower back pain, improve posture, and enhance overall body awareness. By promoting relaxation and releasing tension in the hips, it contributes to a greater sense of well-being.
Definition of Pigeon Pose
Pigeon Pose is a seated hip-opening posture in yoga. The pose involves bringing one leg forward and placing the foot near the opposite hip, while the other leg extends behind you. The torso is then lowered towards the floor, creating a stretch in the hips and groin.
Benefits of Opening the Hips with Pigeon Pose
Opening the hips with Pigeon Pose offers numerous benefits. It stretches and lengthens the muscles of the hips, groin, and thighs, improving flexibility and range of motion. This increased flexibility can alleviate tension and pain in the lower back, promoting better posture and stability. The pose also promotes relaxation and stress reduction, fostering a sense of calm and well-being.
Moreover, it can help improve circulation to the hips and lower body, supporting overall health and vitality.
Target Muscles and Joints
Pigeon Pose engages several key muscles and joints. The primary muscles targeted include the hip flexors, gluteus medius, piriformis, and hamstrings. The pose also stretches the adductors, which are the inner thigh muscles. The major joints involved are the hips, knees, and ankles. Proper alignment in the pose is crucial to ensure a safe and effective stretch, minimizing the risk of injury.
Proper Alignment and Body Positioning
Maintaining proper alignment in Pigeon Pose is essential for maximizing the benefits and minimizing discomfort. Begin by ensuring your hips are squared towards the front of the mat. Keep your back straight and your chest open, and avoid collapsing the spine. Ensure your front knee is directly over your ankle. Adjust the position of your back leg to find a comfortable stretch.
A gentle pressure on the hips, combined with deep breathing, can further deepen the stretch.
Comparison of Pigeon Pose to Other Hip-Opening Poses
| Pose | Primary Focus | Target Muscles | Level of Difficulty |
|---|---|---|---|
| Pigeon Pose | Hip opening, stretching groin, and thigh muscles | Hip flexors, gluteus medius, piriformis, hamstrings, adductors | Intermediate |
| Butterfly Pose | Inner thigh and groin stretch | Inner thighs, groin muscles | Beginner to Intermediate |
| Cow Face Pose | Deep hip and shoulder opening | Hip flexors, groin, shoulders, chest, and back muscles | Intermediate to Advanced |
This table provides a concise comparison of Pigeon Pose to other common hip-opening poses, highlighting their distinct characteristics, target areas, and suitability for different levels of experience. Understanding these differences can assist in selecting the most appropriate pose for individual needs and goals.
Preparatory Poses and Warm-up
: - ZBrushCentral")
A thorough warm-up is crucial before attempting Pigeon Pose. Preparing the body through gentle movements increases blood flow to the targeted muscles, making the pose safer and more effective. This section Artikels preparatory poses and warm-up stretches to optimize your practice and minimize the risk of injury.A well-structured warm-up routine prepares the body for the demands of Pigeon Pose by gradually increasing the range of motion and flexibility in the hips, hamstrings, and ankles.
This process primes the muscles and connective tissues for deeper stretches and prevents potential strains or tears. It also allows for a more mindful and engaging practice.
Hip Opening Preparatory Poses
These poses gently prepare the hip joints for the deeper stretch of Pigeon Pose. They involve gradual movements that progressively increase flexibility and blood flow to the area.
- Figure Four Stretch (Supta Baddha Konasana): This seated stretch targets the inner thighs, groin, and hips. Start by sitting with the soles of the feet together, knees falling open to the sides. Gently press down on the knees with your elbows to deepen the stretch. Hold for 30-60 seconds, repeating 2-3 times.
- Butterfly Pose (Baddha Konasana): Similar to Figure Four, Butterfly Pose stretches the inner thighs and groin. Sit with the soles of the feet together and gently press down on the knees with your hands. You can gently rock back and forth to increase the stretch. Hold for 30-60 seconds, repeating 2-3 times.
- Thread the Needle Pose (Urdhva Mukha Pasasana): This pose stretches the hips, groin, and spine. Lie on your back, bring one knee towards your chest, and then cross the opposite arm over the top of the knee and gently pull it towards the floor. Hold for 30 seconds, repeat on the other side.
Hamstring Stretches
The hamstrings play a significant role in Pigeon Pose. Adequate stretching before attempting the pose helps prevent strain and pain.
- Standing Forward Fold (Uttanasana): Stand with feet hip-width apart, and fold forward from the hips, letting your arms hang naturally or grab opposite elbows. This stretches the hamstrings and lower back. Hold for 30-60 seconds, repeating 2-3 times.
- Reclining Spinal Twist (Supta Matsyendrasana): Lie on your back, bend your knees, and bring them towards your chest. Gently drop your knees to one side, while keeping your shoulders flat on the ground. Hold for 30 seconds, repeat on the other side.
- Hamstring Stretch (Standing): Stand with your legs slightly apart. Extend one leg out in front of you and bend forward from your hips, keeping your back straight. Grab your foot or shin, and hold for 30 seconds. Repeat on the other leg.
Ankle Stretches
Stretching the ankles is essential for maintaining mobility and preventing injury during Pigeon Pose.
- Ankle Circles: Sit on the floor with your legs extended. Gently circle your ankles clockwise and counter-clockwise, increasing the range of motion gradually. Repeat 10-15 times in each direction.
- Ankle Flexion and Extension: Sit with your legs extended. Point your toes towards the ground and then lift them up towards your shins. Repeat 10-15 times. Hold each position for a few seconds.
- Toe Touches: Sit with your legs extended and gently try to touch your toes with your fingers. If you can’t reach your toes, reach for the ankle or calf. Hold for 15-30 seconds.
Dynamic Warm-up Stretches
Dynamic stretches increase blood flow and prepare the muscles for the more static stretches of Pigeon Pose.
- Hip Circles: Stand with your feet hip-width apart. Slowly circle your hips clockwise and counter-clockwise, gradually increasing the range of motion. Repeat 10-15 times in each direction.
- Leg Swings: Stand with one leg extended and gently swing the other leg forward and back. Repeat 10-15 times per leg. Gradually increase the range of motion as you become more comfortable.
- Torso Twists: Stand with your feet hip-width apart. Slowly twist your torso to the right and left, keeping your core engaged. Repeat 10-15 times in each direction.
Modifications for Different Levels
Modifications are essential for adapting poses to individual needs and abilities.
- Beginner Modifications: For beginners, use blocks or blankets under the hips to reduce the intensity of the stretch. Alternatively, modify the preparatory poses and stretches by performing them seated or standing.
- Intermediate Modifications: Intermediate practitioners can increase the duration and depth of the stretches. Engage in the dynamic stretches for a longer period to increase the flexibility of the hip, hamstring, and ankle joints.
- Advanced Modifications: Advanced practitioners can explore variations of the preparatory poses, such as adding more weight to the stretch.
Steps to Perform Pigeon Pose
Pigeon Pose, or Eka Pada Rajakapotasana, is a fantastic hip-opening asana that stretches the hips, thighs, and groin. Proper execution is key to maximizing the benefits and avoiding potential injuries. This section Artikels the precise steps for entering and exiting the pose safely and effectively, along with important considerations and variations.Understanding the sequence of movements and focusing on alignment will lead to a deeper stretch and a more fulfilling practice.
Crucially, remember to listen to your body and adjust the pose as needed to find your comfort zone.
Entering Pigeon Pose
To enter Pigeon Pose, begin in a tabletop position. This foundational posture prepares the body for the subsequent movements. Ensure your wrists are directly beneath your shoulders and your knees are beneath your hips.
- Step 1: Extend one leg forward, placing the foot near or just outside the hand on the same side. The knee should be positioned directly over the ankle. Maintain a straight line from the heel to the knee.
- Step 2: Gently lower your torso toward the floor. Focus on keeping your hips square to the front of the mat. Avoid letting the hips drop towards one side.
- Step 3: Place your hands on the floor or use props like blocks or blankets to support your torso. Adjust the position of your hands to maintain a neutral spine. The aim is to feel a stretch in the outer hip and groin region, but avoid forcing the stretch.
- Step 4: Once settled, press your back foot into the ground to enhance the stretch. If you feel a strain in your knee, consider slightly adjusting the position of your foot. Ensure the knee remains over the ankle.
Important Considerations
Correct placement of the foot and hands is crucial for proper alignment and to maximize the benefits of the pose. Adjusting the position of your foot and hands will help in maintaining a stable posture.
- Foot Placement: Keep the front foot flat on the floor, or slightly angled out. Ensure the foot is not too far forward, which might put strain on the knee. Avoid placing the foot directly in front of the opposite hip, which may lead to discomfort. Adjusting the foot placement ensures the stretch is focused on the target area.
- Hand Placement: Position your hands shoulder-width apart, either directly on the floor or on blocks. Ensure your arms are straight and supporting your torso. Keep your shoulders relaxed and away from your ears. Proper hand placement is crucial for balance and comfort.
Variations of Pigeon Pose
Different variations of Pigeon Pose cater to varying needs and abilities. These adjustments can modify the intensity and target specific areas.
| Variation | Description |
|---|---|
| Modified Pigeon Pose | If you feel discomfort in your hips or knees, use props like blankets or blocks under your hips or hands to elevate your body and reduce the intensity of the stretch. |
| Extended Pigeon Pose | This variation involves extending the arms forward or overhead. This can increase the stretch in the chest and shoulders while still engaging the hip opener. |
| Pigeon Pose with Twist | From a standard Pigeon Pose, twist your upper body to the side of the extended leg to deepen the stretch in the obliques and spine. |
Common Mistakes and How to Avoid Them
Understanding common mistakes can help you execute Pigeon Pose correctly and safely.
- Dropping the hips: Ensure your hips are square to the front of the mat to avoid placing unnecessary stress on one side of the body.
- Knee collapsing inwards: Keep the knee directly over the ankle. If the knee collapses inwards, adjust the position of the foot. This ensures the hip flexors and groin are being stretched effectively.
- Forcing the stretch: Avoid pushing yourself beyond your comfort zone. Listen to your body and adjust the pose as needed. Pushing too hard can cause injuries.
Exiting Pigeon Pose
Safely exiting the pose is as important as entering it.
- Step 1: Gently press your hands into the floor to help lift your torso back up.
- Step 2: Slowly bring your leg back to the tabletop position.
- Step 3: Repeat on the other side, if desired.
Modifications and Adaptations for Different Body Types
Pigeon Pose, while beneficial, may not be suitable for everyone in its standard form. Understanding modifications is crucial for ensuring safety and effectiveness for individuals with varying levels of flexibility, injuries, or physical limitations. This section explores adaptations to tailor the pose to individual needs.Individual needs and limitations play a crucial role in determining the appropriate modifications for a yoga pose like Pigeon Pose.
Modifying the pose can ensure that the practice remains safe and beneficial for individuals with varying levels of flexibility, injuries, or physical limitations.
Modifications for Beginners and Limited Flexibility
Beginners or those with limited hip flexibility may find the full Pigeon Pose challenging. Modifications allow for a gentler approach to the pose, enabling gradual progression towards the full expression. This includes adjustments in the placement of the body, the support needed, and the duration of the hold.
- Knee Support: Using a blanket or bolster under the front knee can reduce strain on the hip flexors and knee joint. This support provides comfort and allows for a deeper stretch without the need for immediate full flexibility.
- Back Support: Resting the hands on a block or the floor can assist in maintaining a stable posture and preventing back strain. This support aids in maintaining correct alignment.
- Modification in the forward fold: If the forward fold is difficult, a block or folded blanket can be placed under the hands, allowing the torso to rest comfortably on the supporting surface. This modification reduces the intensity of the stretch on the hips and knees, making it more accessible for beginners.
Adjustments Based on Individual Needs
Adjustments to Pigeon Pose should be personalized. This means that the modifications should align with the individual’s specific needs and limitations. A careful assessment of the body’s current state of flexibility and any potential injuries is crucial.
- Tight Hips: Using a block or blanket under the hips can support the pose and reduce strain on the tight hip flexors. This allows the individual to experience a gentle stretch while accommodating their current flexibility.
- Tight Hamstrings: Keeping the back straight and engaging the core muscles helps to prevent excessive strain on the hamstrings. Using a block or strap to support the torso can further reduce the intensity of the stretch on the hamstrings. The block or strap can be used to extend the hands further forward, thus reducing strain.
- Knee Issues: If there are concerns about the knees, ensure the knee is placed directly above the ankle, maintaining a 90-degree angle. If discomfort is experienced, adjusting the position of the front foot or using additional support under the front knee is recommended. This will help ensure the joint does not experience undue stress.
Modifications for Specific Injuries or Conditions
Specific injuries or conditions may require tailored modifications. Consulting with a healthcare professional or qualified yoga instructor is crucial to ensure safety and avoid exacerbating any existing conditions.
| Injury/Condition | Modification |
|---|---|
| Knee pain | Avoid deepening the stretch if knee pain is present. Modify the pose to a gentler variation or alternative pose. Support the knee with a blanket or cushion. |
| Lower back pain | Keep the hips square to the floor and avoid arching the lower back. Support the lower back with a blanket or cushion. |
| Shoulder or neck pain | Modify the arm placement to avoid putting undue strain on the shoulders or neck. Using a support under the torso can also help with this issue. |
| Pregnancy | Modify the pose based on trimester and comfort level. Avoid deep stretches or compressing the abdomen. Support the body as needed. |
Listening to Your Body
“It’s essential to listen to your body during the pose and avoid pushing beyond your limits.”
This principle applies to all yoga poses, and Pigeon Pose is no exception. Discomfort is a signal to adjust the pose or discontinue the practice entirely. Respecting these signals ensures a safe and positive yoga experience.
Deepening the Stretch and Holding the Pose
Pigeon Pose, or Eka Pada Rajakapotasana, offers a profound stretch for the hips, thighs, and groin. Mastering the technique to deepen the stretch and hold the pose for extended periods can unlock significant benefits. This section will guide you through these advanced aspects of the practice, emphasizing safety and proper alignment.Deepening the stretch in Pigeon Pose involves a combination of subtle adjustments and mindful engagement.
These techniques, when applied correctly, can enhance the benefits of the posture, but are best approached gradually and with awareness of your body’s limits. Holding the pose for extended periods further amplifies the therapeutic effects, leading to improved flexibility, reduced tension, and a greater sense of well-being.
Techniques for Deepening the Stretch
Careful attention to alignment and positioning is key to maximizing the stretch in Pigeon Pose. Moving the front knee further forward or adjusting the back leg can affect the intensity of the stretch. Experiment with these minor modifications to discover what feels most appropriate for your body. Maintaining a neutral spine is equally crucial, preventing undue strain on the lower back.
Engaging the core muscles helps stabilize the body and allows the hips to open more fully.
Benefits of Holding the Pose for Extended Periods
Prolonged holds in Pigeon Pose can yield a range of benefits. Sustained stretches promote increased flexibility and range of motion in the hips, which can positively impact posture and movement throughout the day. The pose also facilitates release of tension and stress, potentially leading to a more relaxed state of mind. This release of tension can also contribute to a sense of calm and improved overall well-being.
Over time, consistent practice can lead to a more balanced and mobile body.
Maintaining Proper Alignment During Prolonged Holds
Maintaining correct alignment during extended holds is essential for maximizing benefits and minimizing the risk of injury. Keep the front knee directly aligned with the ankle. Ensure the back knee is positioned directly behind the back hip. The spine should remain in a neutral position, avoiding any rounding or arching. Actively engaging the core muscles will further aid in maintaining stability.
It’s crucial to listen to your body and not push beyond your limits. Adjust the pose as needed to ensure comfort and proper alignment.
Breathing Effectively During the Pose
Conscious breathing plays a vital role in any yoga practice. In Pigeon Pose, focus on slow, deep breaths. Inhale deeply, filling your lungs completely, and exhale slowly, releasing any tension. Maintaining a consistent breathing rhythm helps to calm the mind and body, further enhancing the benefits of the pose. Deep and controlled breathing allows the body to relax more fully, promoting a greater sense of calm and well-being.
Progressing the Pose Safely Over Time
Progressing to more advanced variations of Pigeon Pose should be approached with caution and gradual steps. Gradually increase the duration of your hold, starting with shorter periods and gradually extending it as your body adapts. Experiment with variations that shift the intensity of the stretch. Consulting with a qualified yoga instructor is recommended for guidance on appropriate progression and modifications.
Proper guidance can ensure the safety and effectiveness of your practice.
Common Mistakes and How to Correct Them
Practicing Pigeon Pose correctly is crucial for maximizing its benefits and minimizing potential risks. Understanding common errors and their corresponding corrections empowers practitioners to develop a safe and effective practice. This section details these pitfalls and provides guidance for refining your form.Careful attention to alignment and proper sequencing are key to achieving a safe and beneficial experience in Pigeon Pose.
Neglecting these aspects can lead to strain in the hips, knees, or back. Understanding and addressing these mistakes is paramount to a productive and enjoyable practice.
Incorrect Hip and Knee Alignment
Improper hip and knee alignment can lead to discomfort and potentially exacerbate existing joint issues. Maintaining proper alignment throughout the pose is essential for safety and effectiveness.
- Incorrect Alignment: The knee is pushed excessively inward or outward, leading to discomfort and potential strain on the knee joint. The hip on the grounded leg may not be properly aligned, leading to an uneven distribution of weight.
- Correct Alignment: Ensure the knee tracks directly over the ankle. Maintain a neutral alignment of the hip on the grounded leg, ensuring a balanced weight distribution. Visualize a straight line from the grounded hip to the knee, then to the ankle.
Insufficient Hip Opening
Failure to adequately open the hips can limit the stretch and prevent the full benefits of the pose. Thorough hip opening is crucial for proper alignment and effectiveness.
- Insufficient Hip Opening: The hips are not sufficiently opened, leading to limited range of motion and reduced stretch in the hips, groin, and thighs. This can also place strain on the back and knees.
- Correct Hip Opening: Engage the muscles of the grounded hip to gently rotate the thigh outward. Gently press the outer edge of the grounded hip and thigh down towards the floor. Consider gently pushing your hips forward while keeping your torso upright to further open the hip.
Forward Folding with Rounded Back
Folding forward with a rounded back can strain the lower back and limit the stretch. Maintaining a neutral spine is vital for safety and effectiveness.
- Incorrect Forward Fold: The spine rounds excessively during the forward fold, creating strain in the lower back. This limits the stretch to the hips and often involves compressing the lumbar spine.
- Correct Forward Fold: Keep the spine as straight as possible while gently folding forward from the hips. Engage the core muscles to maintain stability and prevent the back from rounding. Visualize lengthening the spine towards the ceiling.
Ignoring Individual Limitations
Pigeon Pose, like any other asana, requires acknowledging and respecting individual limitations. Pushing beyond these boundaries can lead to injury.
- Importance of Individual Limitations: Modifications and adjustments should be made based on the individual’s physical capabilities and limitations. Avoid forcing the pose into a position that causes pain or discomfort.
- Respecting Limits: If a particular stretch is painful, adjust the pose accordingly to minimize the strain. Consider alternative variations or modifications to achieve a beneficial stretch without causing harm.
Potential Risks of Incorrect Practice
Incorrect practice of Pigeon Pose can result in various risks. Awareness of these potential hazards is critical for safe practice.
- Potential Risks: Improper form can lead to knee pain, hip strain, lower back pain, or even further aggravation of pre-existing injuries. The risk of injury increases with pushing beyond one’s limitations.
- Minimizing Risks: Prioritize proper alignment, gentle movement, and listening to your body’s signals. If pain arises, discontinue the pose and consult a healthcare professional if necessary.
Contraindications and Precautions

While Pigeon Pose (Eka Pada Rajakapotasana) is generally a beneficial asana, it’s crucial to understand potential contraindications and precautions to ensure a safe and effective practice. Proper awareness of limitations and modifications is essential for injury prevention and maximizing the benefits of the pose.Understanding the limitations of your body and tailoring your practice to suit individual needs is paramount in yoga.
This section highlights situations where modifications or avoidance of Pigeon Pose are necessary.
Situations Requiring Modification or Avoidance
Practitioners should exercise caution and possibly modify or avoid Pigeon Pose in certain situations. Awareness of individual limitations is key to safe practice.
- Knee Injuries: Individuals with knee injuries, such as torn ligaments or cartilage damage, should modify or avoid Pigeon Pose to prevent further stress or aggravation of the existing condition. A modification could involve placing a bolster or blanket under the front knee to reduce stress on the joint.
- Hip Injuries: Individuals with hip injuries, including labral tears, impingement, or bursitis, should modify or avoid the pose, or seek guidance from a qualified instructor. The hip flexors and surrounding muscles are stressed during Pigeon Pose, so the risk of exacerbating an existing condition is a concern.
- Back Pain: Those experiencing severe lower back pain should avoid Pigeon Pose or modify it to alleviate the stress on the spine. Modifications may involve using a support under the hips or avoiding deep stretches. A qualified professional should be consulted for specific guidance.
- Pregnancy: During pregnancy, practitioners should avoid deep hip stretches, including Pigeon Pose, as they can put unnecessary strain on the pelvic area and growing baby. Consult with a qualified prenatal yoga instructor for suitable modifications.
- Recent Spinal Surgeries: Following spinal surgery, Pigeon Pose should be avoided or modified under the strict guidance of a physician and qualified yoga instructor. The pressure on the spine and surrounding tissues could be harmful.
Specific Medical Conditions Requiring Adjustments
Certain medical conditions necessitate specific modifications or complete avoidance of Pigeon Pose.
- Osteoarthritis: Individuals with osteoarthritis of the hip or knee should carefully modify Pigeon Pose to avoid excessive stress on the affected joints. Using props like blankets or blocks can reduce pressure on the joints.
- Sciatica: If sciatica is present, Pigeon Pose may aggravate the pain. Modifying the pose, such as reducing the depth of the stretch or using a bolster under the hips, can help alleviate discomfort.
- Spondylolisthesis: Individuals with spondylolisthesis should avoid Pigeon Pose, as it could potentially worsen the condition. Consult with a healthcare professional for appropriate exercises.
Modifications Based on Injuries or Conditions
Modifications are crucial for accommodating various injuries and conditions.
| Condition/Injury | Modification |
|---|---|
| Knee Pain | Place a bolster or rolled-up blanket under the front knee to reduce stress on the joint. A slightly less deep stretch may be necessary. |
| Hip Pain | Use a blanket or block under the hips to support the pelvis and reduce the stress on the hip joint. |
| Back Pain | Avoid deep stretches. Support the lower back with a bolster or blanket. If pain persists, discontinue the pose. |
| Pregnancy | Avoid deep hip stretches. Modify the pose to a gentler variation, or choose an alternative pose. |
Combining Pigeon Pose with Other Poses
Enhancing the benefits of Pigeon Pose often involves integrating it into a flowing sequence with other asanas. This approach not only deepens the stretch and flexibility in the hips but also promotes overall body awareness and balance. Combining poses can create a dynamic and rejuvenating yoga practice.
Suggested Sequences
A well-structured sequence should consider the progressive nature of poses, ensuring a smooth transition between each. This approach avoids abrupt movements and allows the body to adapt to the increased intensity gradually. A common principle is to warm up with gentle poses and progressively increase the intensity, culminating in the target pose.
Flow Chart for a Yoga Routine
A flow chart for a yoga routine incorporating Pigeon Pose can illustrate the progression from warm-up to the target pose and back to relaxation. This structured approach enhances the efficacy of the practice.  (Placeholder for a flow chart visual. A flow chart would include a series of boxes or shapes representing different poses, arrows indicating the flow, and a clear progression. For example, starting with a standing warm-up, followed by seated stretches, and then moving to the hip-opening poses, including Pigeon Pose, and concluding with Savasana.)
Complete Hip-Opening Yoga Practice
This sequence emphasizes hip opening and flexibility. Warm-up poses, like Cat-Cow and Sun Salutations, are crucial for preparing the body. Gentle seated stretches, like Butterfly Pose, prepare the hips. Then, Pigeon Pose can be included in the sequence. Closing with restorative poses, like Child’s Pose and Savasana, completes the routine.
- Warm-up (5 minutes): Cat-Cow, Sun Salutations A & B.
- Hip Opening (10 minutes): Butterfly Pose, Thread the Needle Pose, Reclined Spinal Twist.
- Pigeon Pose (10 minutes): Hold each side for 1-3 minutes, focusing on maintaining a neutral spine.
- Cool-down (5 minutes): Child’s Pose, Savasana.
Beginner Routine
A beginner routine should focus on controlled movements and gentle transitions.
- Warm-up (3 minutes): Child’s Pose, Cat-Cow.
- Seated Stretches (5 minutes): Butterfly Pose, Seated Forward Fold.
- Pigeon Pose (5 minutes): Hold each side for 30-60 seconds, using modifications as needed.
- Cool-down (3 minutes): Child’s Pose, Savasana.
Complementary Poses
This table Artikels poses that complement Pigeon Pose, offering additional hip opening and flexibility. Pairing these poses with Pigeon Pose in a sequence enhances the benefits of the entire practice.
| Pose | Benefit |
|---|---|
| Butterfly Pose | Opens inner thighs and groin |
| Cow Pose | Stretches hips and spine |
| Downward-Facing Dog | Stretches hamstrings and calves |
| Thread the Needle Pose | Stretches shoulders and hips |
| Lizard Pose | Opens hips and stretches thighs |
Benefits of Opening Your Hips with Pigeon Pose

Pigeon Pose, or Eka Pada Rajakapotasana, offers a multitude of benefits for the body, extending beyond just stretching the hips. Proper hip opening through this pose can positively impact overall posture, movement, and even pain relief. Understanding these advantages can motivate you to incorporate this beneficial practice into your routine.
Physiological Benefits of Hip Opening
The hips are a complex joint, crucial for movement and stability. Pigeon Pose targets the muscles and ligaments surrounding the hip joint, promoting flexibility and range of motion. This improved flexibility can enhance your ability to perform everyday tasks with ease and grace. Furthermore, the stretching action in the pose stimulates blood flow to the hips, promoting healthy tissue function.
Impact on Overall Posture and Movement
Tight hips can lead to compensatory postural adjustments, potentially causing back pain or discomfort in other areas. By opening the hips, Pigeon Pose can help restore a more balanced posture, improving alignment and reducing strain on the spine. Increased hip mobility translates into a wider range of movement in activities like walking, running, and even sitting. This improved mobility can significantly enhance athletic performance in various sports and daily activities.
Connection Between Hip Health and Pain Relief
Stiffness and tightness in the hips can contribute to pain in the lower back, knees, and even the feet. Pigeon Pose, by gently stretching and releasing tension in the hip flexors, hamstrings, and glutes, can alleviate this pain. Regular practice can lead to a reduction in chronic pain associated with hip tightness, promoting a more comfortable and functional lifestyle.
Improvement in Balance and Flexibility
The hip joint is pivotal for balance and stability. Strengthening the muscles surrounding the hip joint, through poses like Pigeon Pose, enhances proprioception (the body’s awareness of its position in space). Improved proprioception leads to better balance, which is crucial for preventing falls and maintaining stability during physical activities. Simultaneously, the increased flexibility gained from consistent practice improves overall flexibility in the body, which can lead to better posture and reduced risk of injuries.
Injury Prevention in Other Activities
Tight hips can increase the risk of injuries during various activities. For instance, tight hip flexors can contribute to knee pain during running or squatting. Pigeon Pose can help alleviate this tightness, reducing the likelihood of such injuries. This is particularly important for athletes and individuals involved in physically demanding activities. By maintaining healthy hip mobility, Pigeon Pose can help prevent injuries in other physical activities and everyday movements.
Closure
In conclusion, mastering Pigeon Pose empowers you to unlock your hip flexibility and enhance your overall well-being. By following the steps Artikeld in this guide, you’ll be well-equipped to safely and effectively incorporate this powerful yoga pose into your practice. Remember to listen to your body, modify as needed, and prioritize safety throughout the process.